DIY Boo Wreath

DIY Boo Wreath for Halloween
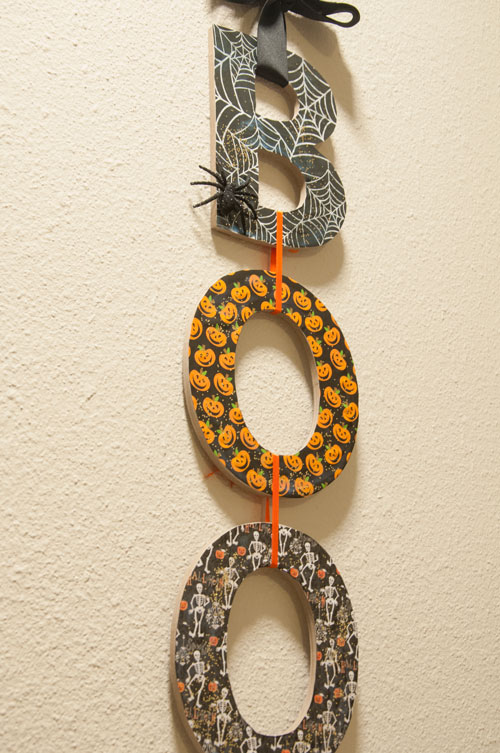
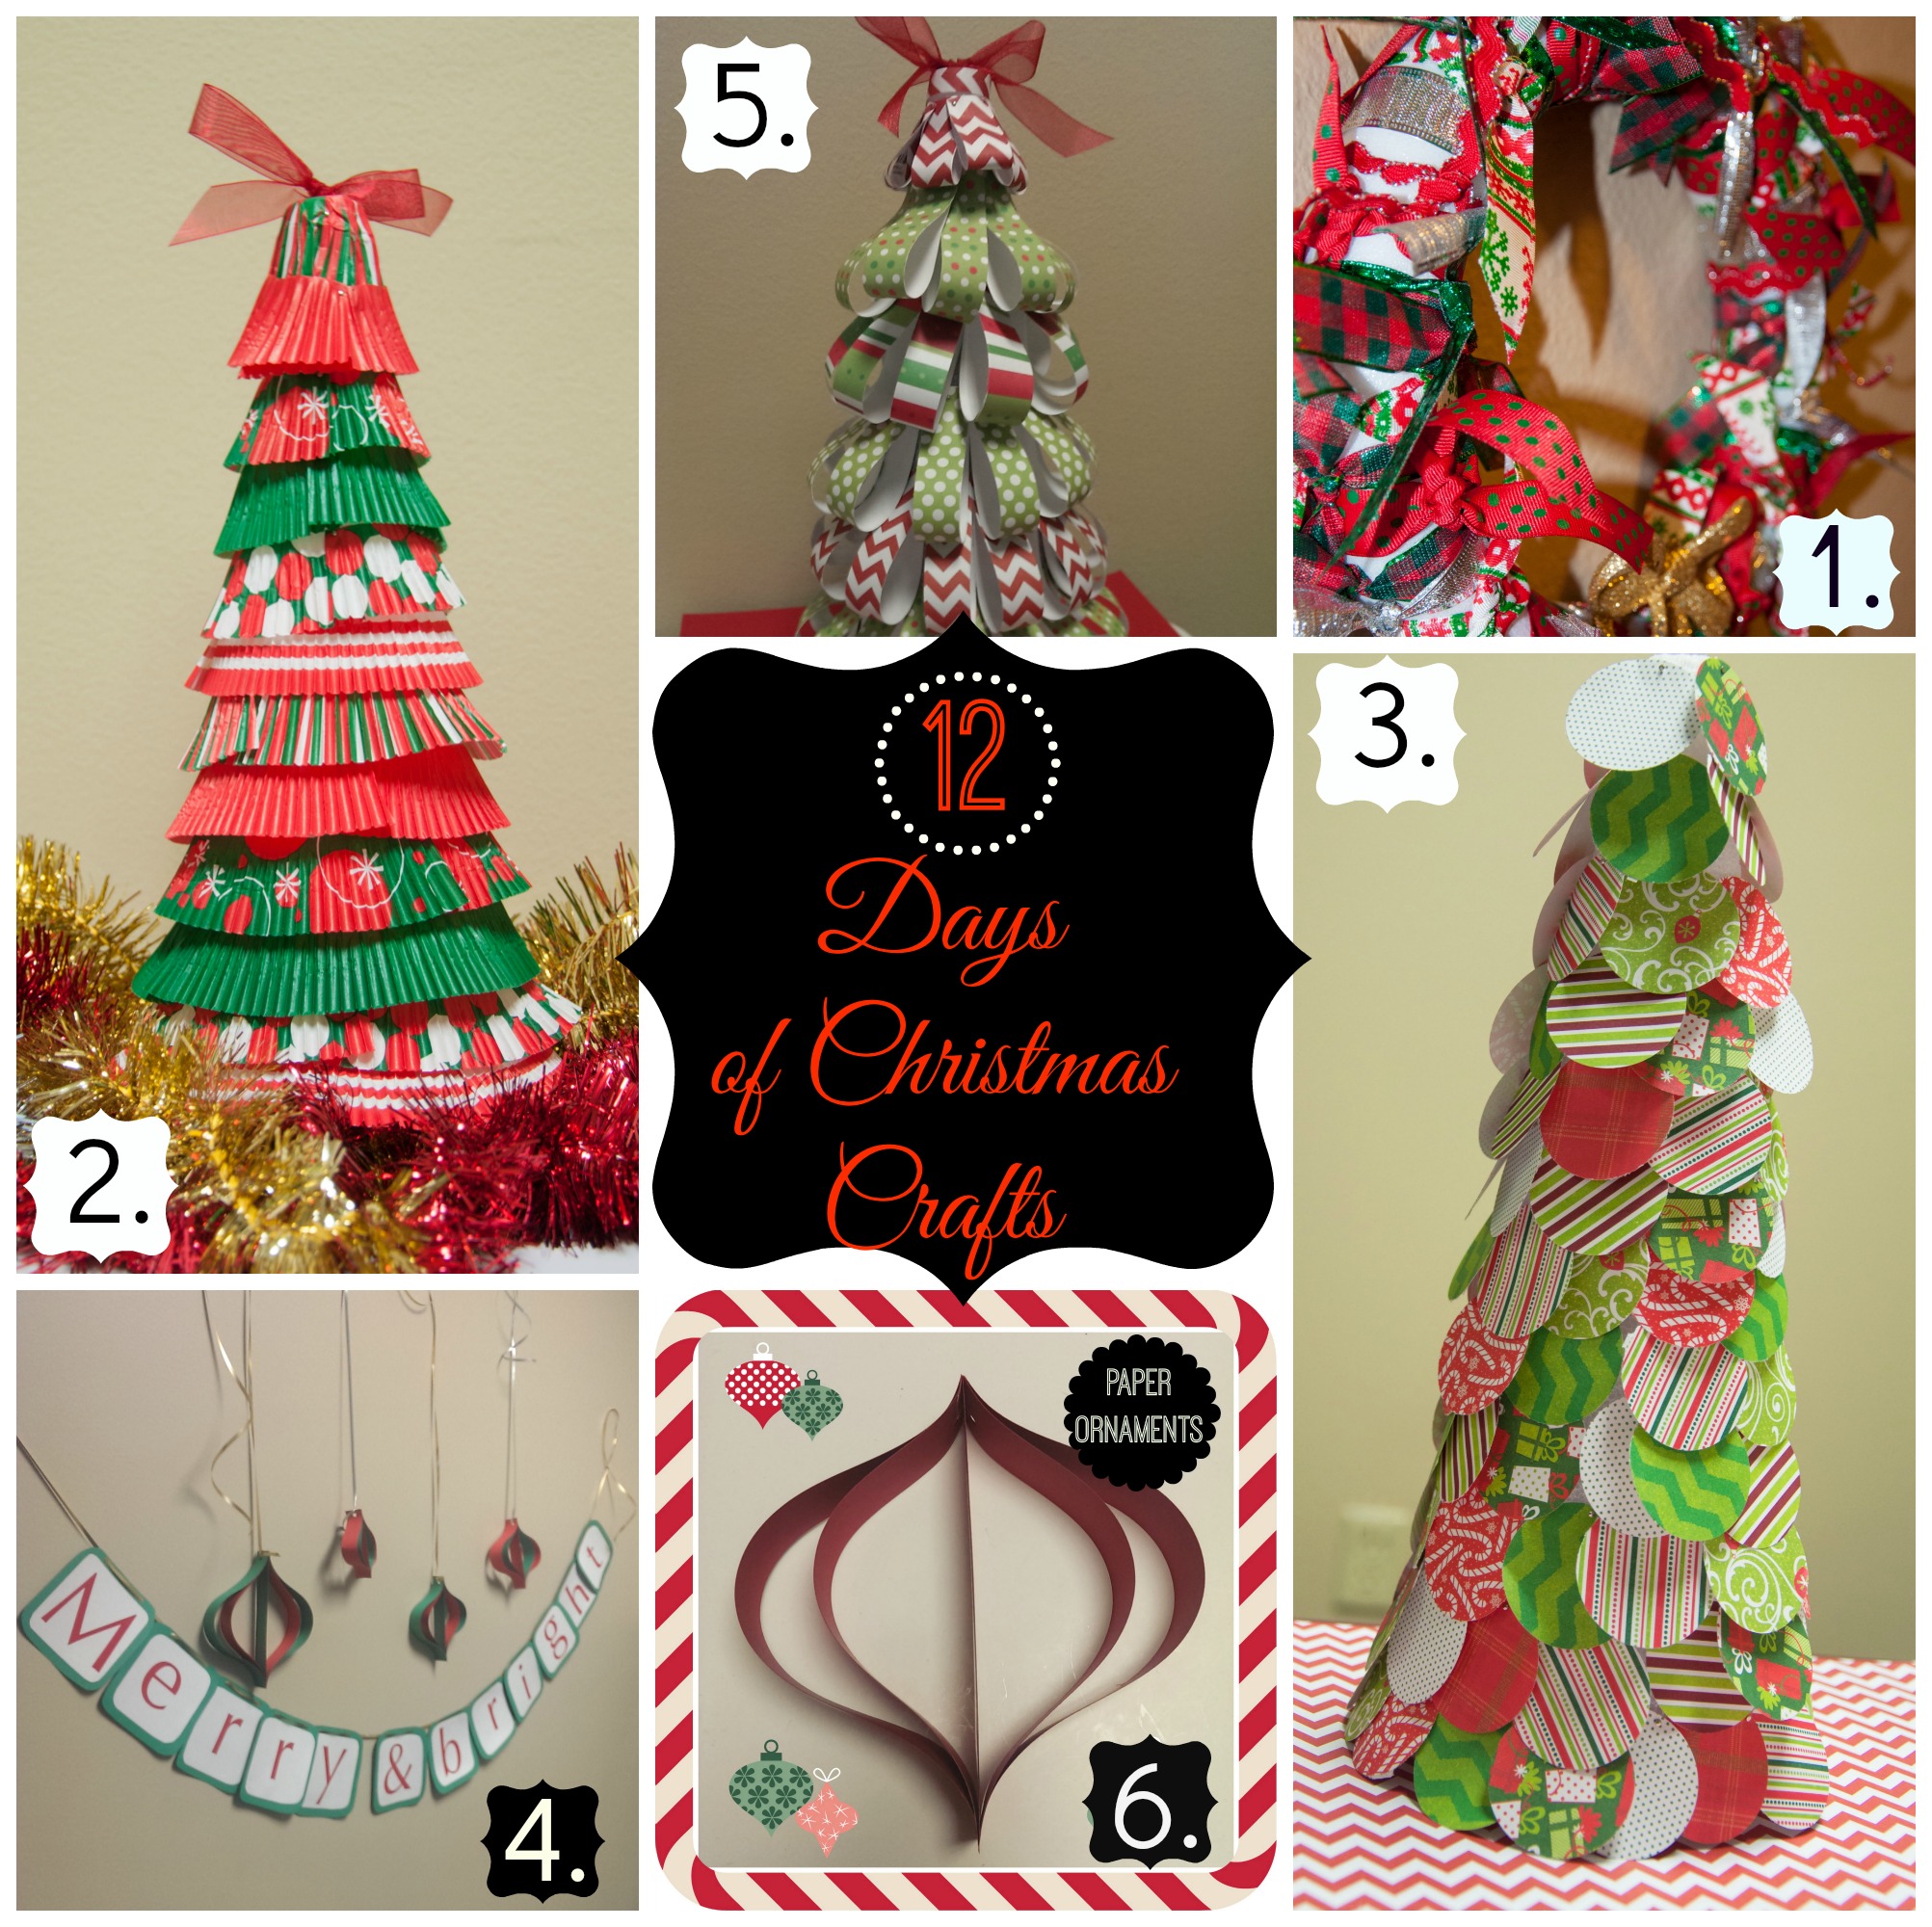
First thing is first, this post should really be named, “I Hate Glitter”.  It’s hard to tell in the photos, but I sprinkled glitter on my Boo sign and it is now all over my entire house. It’s ridiculous. Now, onto the real point of the post: I love to craft. Finding time to craft is a whole different story, but when I get in crafting mode it’s on. Just you wait until Christmas time and the 12 days of Christmas Crafts…it gets crazy around these parts! Today’s craft is one that I have actually had the supplies for for about 3 years. Yes, I know…thats a long time but it’s true. I bought these cardboard cut out letters that say BOO at Hobby Lobby 3 years ago. I found them in a box when I was going through my craft room supplies and I kept them out specifically with the intention of making them into a pretty sign this year. It HAD to happen. Well, luckily it did and it was super easy to make too. I think my sign turned out amazingly!
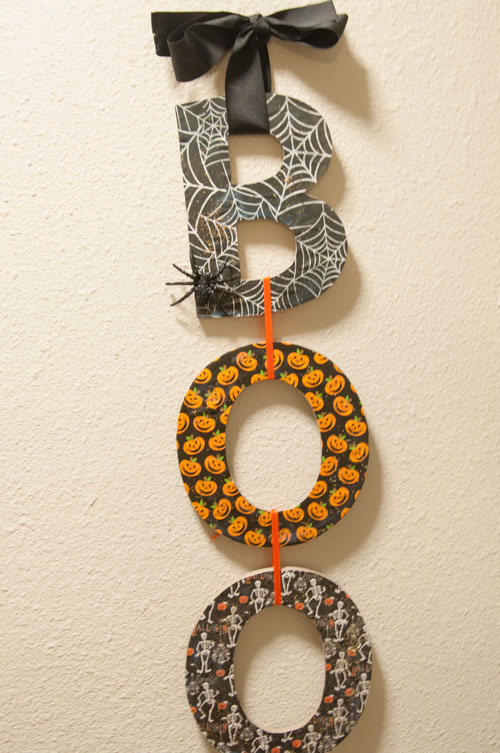
Boo Halloween Craft

Supplies:

  • BOO Cardboard Letters
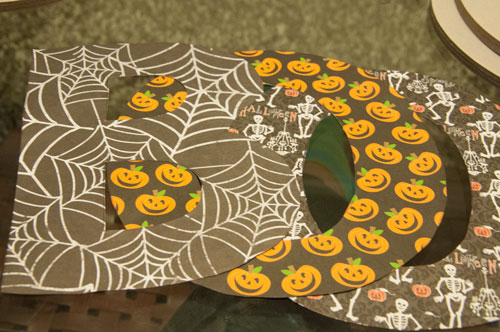
  • Halloween scrapbook paper
  • Scissors
  • Glue
  • Ribbon
  • Polyurethane Spray or Modpodge
  • Sparkles and other Halloween accents
DIY Boo Cardboard Letters

Directions:

  1. Lay your scrapbook paper down on the table and trace your letters on it with a pencil.
  2. Cut out the letters and glue them on to the cardboard letters.
  3. Decorate with any fun Halloween-y scrapbook items you have lying around.
  4. Spray with Polyurethane spray or brush on your modpodge.
  5. Tie the letters together with your ribbon, tying the ribbon together in the back so that you can’t see the knot. (You can use a stapler too.)
  6. Tie a big bow at the top of the B leaving a little room to use as a hanger.
  7. Hang on your door or wall as the cutest Halloween decoration you could ever want!
Boo Wreath
I hope you all enjoy making this sign/wreath! Have fun!All That Glitters Blog Signature

12 Days Of Christmas Crafts Day 2: Cupcake Liner Christmas Tree

12 days of Christmas CraftsHi Lovelies!

Welcome to Day 2 of the 12 days of Christmas crafts! Today I am going to show you how to make a cupcake liner Christmas tree! To begin you will need a foam cone, cupcake liners, scissors, straight pins, and some ribbon as shown below:

Cupcake Christmas Tree

To begin you will need to cut the bottoms off of the cupcake liners as shown:

Cupcake Wrapper Christmas Tree

Next, take the bottomless cupcake liners and stretch them around the base of the foam cone. Pin them into place. You will need more than one liner per layer at the bottom of the tree, and progressively less as you move upwards.

Cupcake Craft Christmas Tree

You can alternate patterns as you go up, or use the same design the entire way! Evenly space the liners so that the patterns on each layer show, but the pins do not.

Cupcake liner Christmas Tree Base

Before you make it to the very top, you will want to take an uncut cupcake liner and cover the point. Pin it into place. Then cover those pins with the last liner layer. I then tied a ribbon and pinned it in to place on the very top. You could also glue a paper star to a toothpick and stick this into the top!

There you have it, a cupcake liner Christmas tree!

Cupcake liner Christmas Trees

Have questions? Ask them below! Stay tuned tomorrow for Day 3 of Christmas crafts!

Until next time…

xox Megan

Want to see the other 11 days of Christmas crafts? Here they are:

12 Days of Christmas Crafts Day 1, Day 2, Day 3, Day 4, Day 5, Day 6, Day 7, Day 8, Day 9, Day 10, Day 11, Day 12

Linking up with: Craft Frenzy Friday

Follow on Bloglovin

12 Days Of Christmas Crafts Day 1: Ribbon Wreath

12 days of Christmas Crafts

Hi Lovelies!

Welcome to the 12 days of Christmas crafts! I am so excited about this series, because it’s a little different than what I usually do here on All That Glitters! I love fashion and that is definitely my main focus, but I also love to craft…and Christmas time really brings out the crafter in me:)

Today I am going to show you all the ribbon wreath I made. Now, this could be used for any holiday, or just for everyday use, depending on the types of ribbon you use. I went to Joann’s and picked out some really great ribbons (my favorite is the fair isle print….LOVE), as well as a styrofoam wreath. You could probably use one of those wire wreaths if you want, I just find that it looks fuller faster if you have the extra bulk of the styrofoam.

As you can see below you just cut the ribbon into small pieces, they don’t all have to be the same length, and tie them securely around the styrofoam wreath until it is as full as you would like it! Easy as pie!Christmas Ribbon Wreaths

I really like how it turned out and I might even make a bigger one for my front door! Another cool thing you could do is cut up little pieces of fabric and tie them on. I’m just lazy and didn’t want to cut all of the strips, ribbon is much easier.

DIY Ribbon Wreaths

As a finishing touch I bought this sparkly bow from Joanns. It was actually made to stick into a wreath, I believe, because it has a metal rod attached. I stuck that baby into the styrofoam and cut it to fit.

Do you have any fun Holiday crafts you have blogged about? Share them in the comments if you do, I would love to see them!

Until next time…

xox Megan

Want to see the other 11 days of Christmas crafts? Here they are:

12 Days of Christmas CraftsDay 1, Day 2, Day 3, Day 4, Day 5, Day 6, Day 7, Day 8, Day 9, Day 10, Day 11, Day 12

Linking up with: Crafty Christmas

Follow on Bloglovin

Gettin’ Crafty: DIY Necklace Hanger!

Hi Lovelies! Happy Hump-day!

I plan on celebrating the half way point this week by going to dinner with my lovely husband and then baking cupcakes with my friend, Chelsea, and having a midweek slumber party:) Yay, girl time! I’m sure there will be pictures of our fabulous cupcake making skills later this week, so stay tuned!

In the meantime, I wanted to share my attempt at a DIY necklace hanger. As some of you may know, before my current job I worked as a manager at an accessory store called Charming Charlie. Lets just say that it is an understatement that I accumulated a lot of jewelery while working there….but that isn’t the point! Well, I guess it sort of is…I have TOO much jewelery and not enough places to store it all! So, on top of all of my other means of storing jewelery, I decided to make one of my own. Here is the finished product:

DIY Jewelery Holder

It was a very easy project. I went to Hobby Lobby and bought an unfinished plaque, paint, paint stencils, drawer knobs, and some Mod Podge. You can also get these items at Michael’s or Joann’s.

DIY Jewelery Holder

I painted the plaque with my background color (at my old apartment it wasn’t the same color as the wall…lol), let it dry,then used a stencil to paint on the designs. After everything was completely dry I painted over it all with Mod Podge. I then had my loving husband drill some holes for the drawer knobs and screwed them in!

DIY Jewelery Holder

Voila! DIY jewelery hanger that matches my bedroom and cost just under $15! I only put a few of my pieces on it for the picture so that you can see the details, but trust me, it is a lot more full now:) Does anyone else have a great example of a DIY necklace hanger?

Thanks for stopping by!

xox Megan